 Vintage Workshop
Services for Brough Superior motorcycles and their contemporaries
|
Vintage Workshop Services for Brough Superior motorcycles and their contemporaries |
Castle fork side dampers, last update: 10/2004
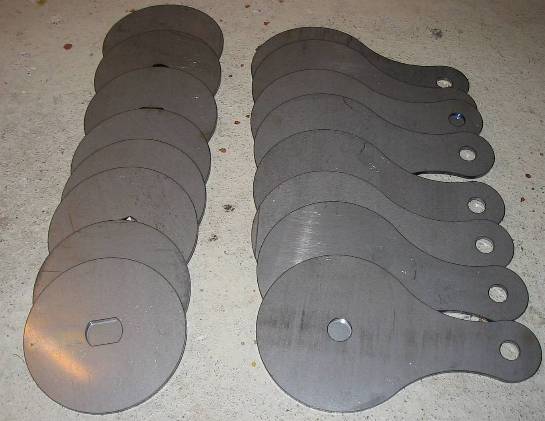
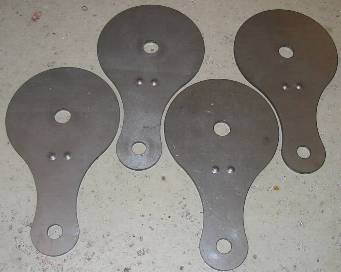
| 8/2004: I have measured a number of different early (i.e. 1926-1928) Castle fork side dampers. I found two different ways of holding the big damper plates. So I decided to have the laser cuttings made in a way that I can make both types out of these. |
|
| On some forks, the inner plate is just pushed on the two flats there are
on the cross bridge bosses. The top plate just bears on the threaded bit of
the boss and the whole lot is pressed together by the star spring.
This is easy to make and assemble, but the inner plate tends to wear the flats and the outer one wears the thread on the bridge boss. On a slightly later fork, I found the inner plate is held by a threaded plate about 2" in diameter and 3/16" thick which is screwed on the thread of the bridge boss and is then secured to the inner damper plate with a 3/16" Whit countersunk screw. In this case, the outer plate bears on the above mentioned 2" plate, and thus needs to have a 2" hole in the middle. I think I can cut that on the lathe relatively easily, should I go for this (technically superior) solution. I have uploaded a file with sketches here, should you be interested. |
|
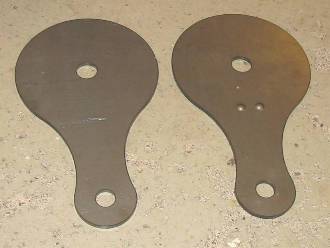
| 10/2004: For some time a question has plagued me: How will I make the nice little dimples that locate the star spring? The pre-'29 damper plates are 3mm thick... |
|
| Well I can assure you I made it. |
|
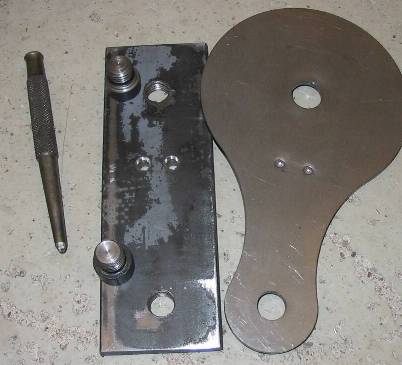
| This is the jig I made.
The raw damper plate is exactly located and held flat by two special bolts that clamp it to 10mm thick base plate. In the base plate there are two slightly countersunk bores. First the damper plate is bolted to the base and the position for the dimples is marked with a special kind of centre punch (not pictured) which is an exact fit in the bores. Then the damper plate is reversed and bolted up again. Now it is "big hammer time". With a special ball-point centre punch the dimples are forged into the bores in the base plate. |
|
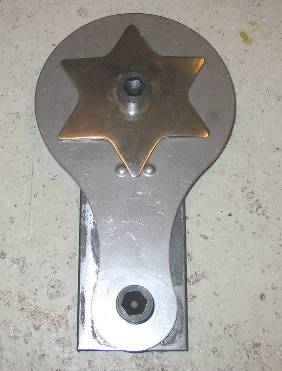
| This is how the end result looks.
At least I am mighty proud of it. |
|
| And it doesn't even take long to punch a few more... |
|
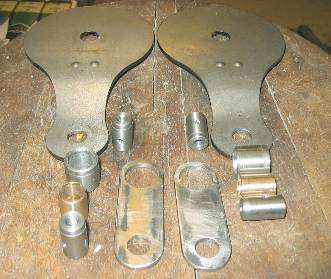
| 11/2004: I finally found some time to go on with the dampers. First I
had to bend the "spoons" which, as I found, is a task not to be taken too
lightly!
Next, as you can see from the picture, a lot of small parts needed to be made. I am not sure if the original Castles used bronze bushes in all the bearings, but I did. |
|
| This is how the whole lot looked after brazing and cleaning up again... |
|
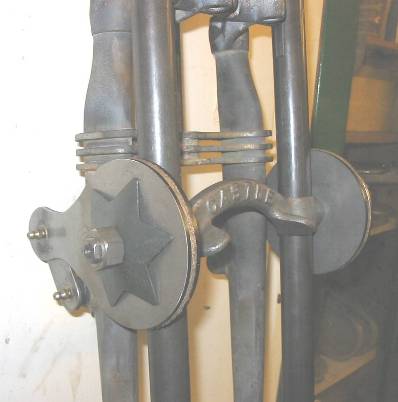
| ...and this is how it looks on the forks.
When the forks will eventually be finished, I'll count the number of bits they are made up of ! |
|
| to be continued... |
Any kind of feedback to
![]() is
appreciated
is
appreciated
(sorry, this is not a clickable 'mailto:' hyperlink. If you want
to write me, please type my address in your mailer. )