 Vintage Workshop
Services for Brough Superior motorcycles and their contemporaries
|
Vintage Workshop Services for Brough Superior motorcycles and their contemporaries |
Castle forks rear legs last update: 2/2004
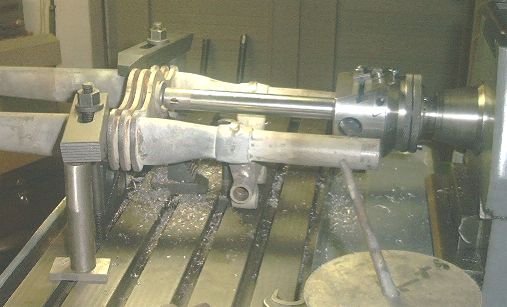
| I spent the best part of a day taking all the twists and bends out of
the legs. The lower ends are easy to straighten, but the top end less so.
Next thing was to bore out the worn ends of the spring plunger bearings, in order to braze bushes in. Unfortunately I forgot to picture this, but you can see the bored-out end on the adjacent pic. Then, as the stem is very thin-walled on the Harley item, and it was quite bent as well, I cut it off and bored out the rest. Please do not try to remove such an item red hot, you will be left with pretty badly bent and scaled bridge plates which will give a lot of trouble when trying to braze a new stem in. (speaking from experience; I once removed a single plate to replace it.) |
|
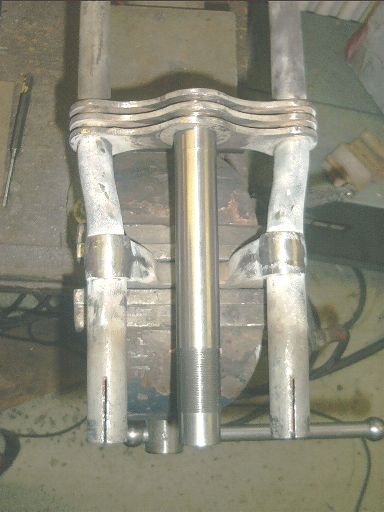
| Turning a new stem from a thick-walled piece of tubing (30mm outer, 19mm
inner dia.) is not beyond the wits of man. But try to know what you are
doing about the lower bearing seat; a slack seat here is a nasty problem
that is almost impossible to cure!
Oh yes, and I did grind away the steering lock stops that are there on a Harley fork, but not on a Castle. Mind you, I am not trying to fake anything (otherwise I would not tell you this), but I want the result to look as close as possible to the original thing! |
|
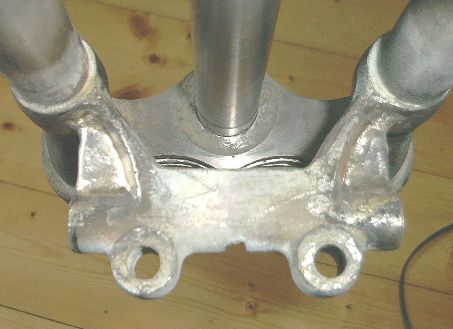
| For which reason I have also brazed in the two little triangular webs on
the left and right hand side of this lug.
Not that they will add a horrible lot of strength, but I feel these are the small things that make for "Superiority" |
|
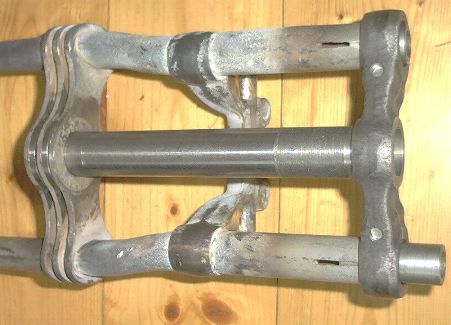
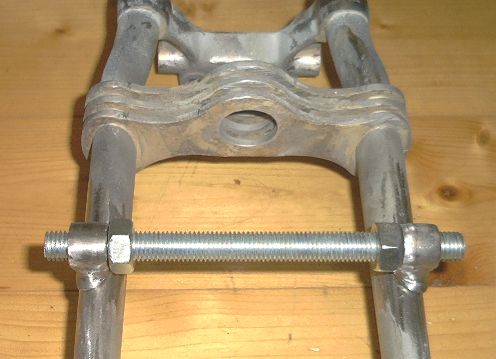
| On the left side of this pic you can see that I have now added the two
heavy "washers" between the plates.
(50mm outer, 29mm inner dia., about 5mm thick) Fabricating them from solid by boring and then cutting them off with a parting tool is no good fun, but sawing them out from a steel plate and then turning either diameter is even worse I think! Now everything should be ready for brazing I hope. |
|
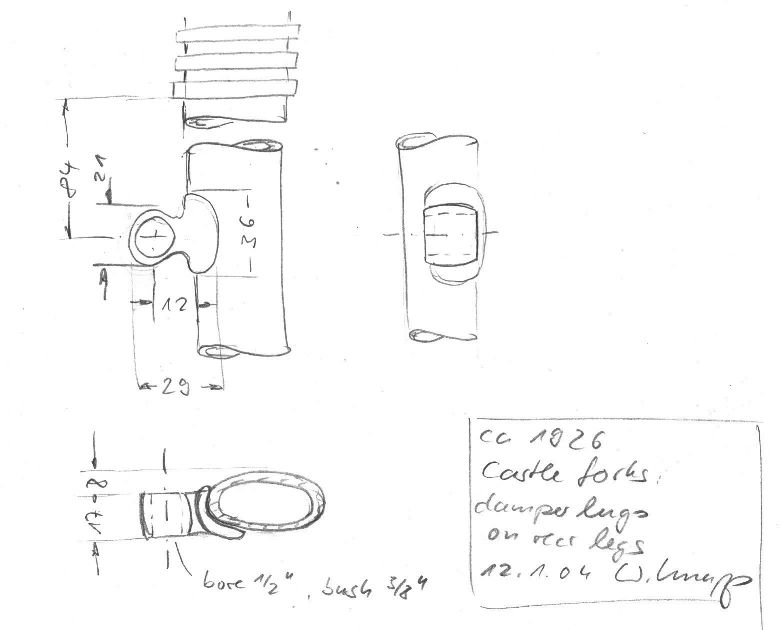
| And I still needed the two little lugs to which the damper actuating
arms attach. I did not feel like building another pattern and try to get
such a small item cast.
So I made them up from a piece of 4mm sheet metal and a turned bit, welded together. Cleaning up the weld took some patience, of course. If you need to make up a pair of these, click on the pic and you will find a little sketch with dimensions. |
|
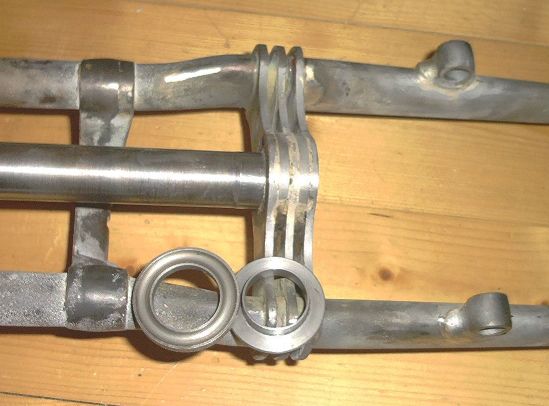
| And I thought it will be as well to provide some means of keeping these little things aligned while brazing them. |
|
| In the meantime I have brazed up the whole lot. Or silver soldered, to
be quite exact. These modern silver solders are very strong, and you do not
need that much heat. But they are expensive... With everything cleaned up a little, it looks quite promising. And I have turned a little "top hat" bush which will carry the bearing. You could argue that I might have finished the lower stem end to the correct diameter for the bearing, but I do not think this is advisable. Firstly I do not want to seat the bearing ring on the top cross plate (which is never quite true to the stem) and apart from that I can turn the intermediate bush to be a good fit on the stem after this has been cleaned up. |
|
| to be continued... |
Any kind of feedback to
![]() is
appreciated
is
appreciated
(sorry, this is not a clickable 'mailto:' hyperlink. If you want
to write me, please type my address in your mailer. )