 Vintage Workshop
Services for Brough Superior motorcycles and their contemporaries
|
Vintage Workshop Services for Brough Superior motorcycles and their contemporaries |
KTOR exhaust coolers last update: 05/2007
I understand George invented these as yet another Brough superiority with a view to avoiding "blued" exhaust elbows. I admit the technical bonus of fitting these devices is debatable (to say the least), but they look ever so sexy....
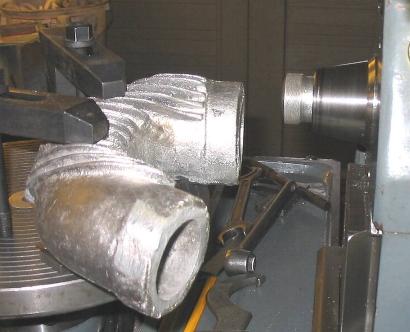
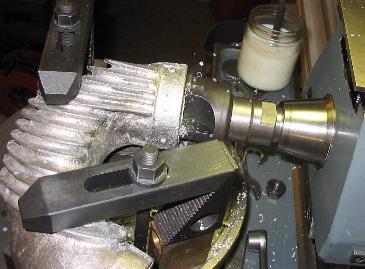
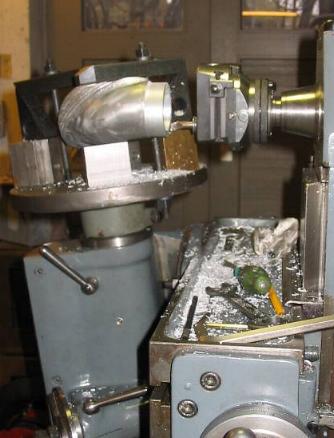
| 3/2005: I was aware
that a casting like this is a bit awkward to clamp and machine unless you
make some quite special jigs to hold it. But I was determined to have a go.
First I thought this would be a nice and simple way to clamp the bit to the table of the ever-so-universal Deckel swivelling dividing head, but I had to find this does not leave enough room for the tools. |
|
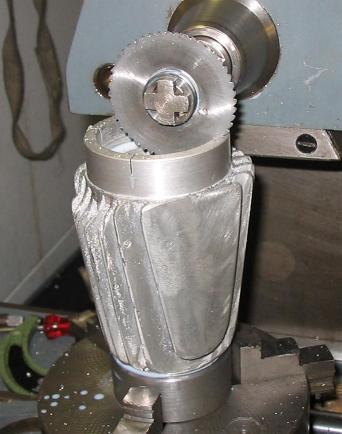
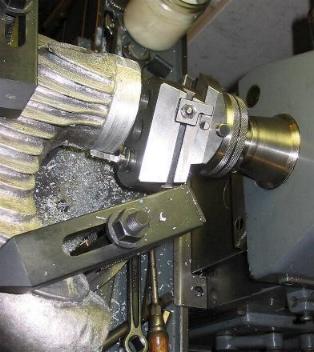
| This is how I ended up clamping the casting. |
|
| Turning the dividing head allowed to align the cylinder head end at right angles to the horizontal spindle so I could face this end of the casting with a big cutter. |
 |
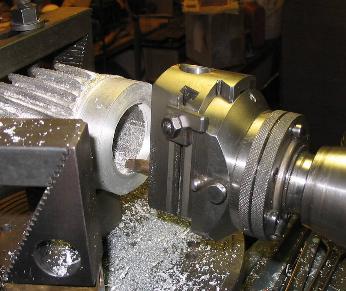
| The outer diameter was finished with my beloved Wohlhaupter head... |
 |
| ... as was the inner diameter. |
 |
| I had to put the vertical head back on in order to nicely slit the stub. |
 |
| It then occurred to me that I had painfully learnt before
that it is very advisable to do all cleaning up and polishing BEFORE
MACHINING a casting.
It is ever so easy to spoil a nicely finished surface having spot-on dimensions with a grinding wheel or sanding disc! So, at least, I did this on the second casting I had. |
 |
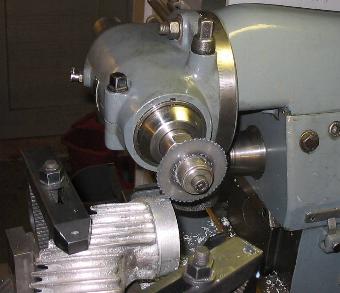
| The other (exhaust pipe side) end required much the same
steps, albeit at a funny angle. This is another example to prove the
versatility of the swivelling dividing head.
Now this end does not want slitting, but cutting a big thread, 2.25"*20 tpi to be precise. The FP1 mill cannot do any screw-cutting, and my enquiries for such a big die yielded a quite shocking price, so I will have to think of a different way to do this.... |
 |
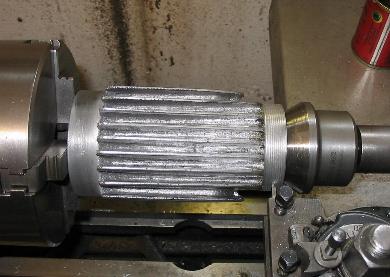
| 5/2007: The rear cooler
castings were currently unavailable, but a good two years later - hey presto - I got a pair!
Machining these was straightforward lathe work...
|
|
| ... and slitting the cylinder head end was another piece of cake. |
|
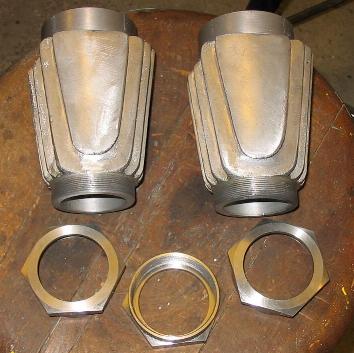
| Making the nuts was another story, however!
When rebuilding the 680 o.h.v., I had bought a piece of thick-walled stainless tubing to make the exhaust nuts from, and this proved big enough for the KTO nuts as well. However, it seems I had forgotten how bad this material machined. It is a normal stainless steel (Wst.Nr. 1.4301; 304S15 in modern or 58E in old English nomenclature), which is soft and at the same time tough like hell, has a tendency to work harden and produces endless curls of razor-sharp swarf entangling work, tool and man - a nightmare! For instance, while screw cutting the (blind) threads inside, the previously exactly bored core diameter decreased by half a millimetre due to cold working. While cutting one thread, I had to rectify this twice by re-boring before continuing to screw-cut ... I took an hour to make each of these threads! Next time I would definitely go for one of the better machinable grades like 1.4305 (303S31 or 58M), no matter if I need to bore out the centre because no hollow material is available in this spec, and no matter if it can be polished or not, and what the corrosion resistance is!
|
 |
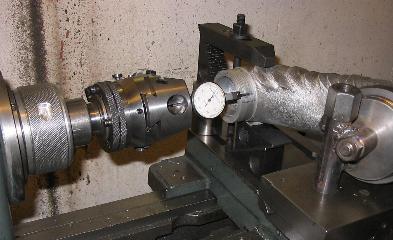
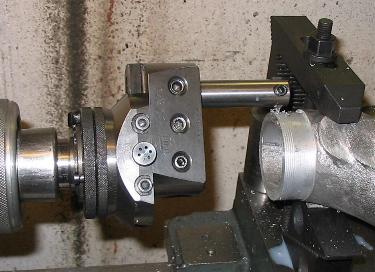
| Well, but now for something interesting and more pleasant:
As mentioned above, I had no idea how to cut the threads on the front exhaust elbows. A 2 1/2"x20 tpi die is a bit exotic in price and I am not sure how well you can thread it manually over such a big stub in soft aluminium. On the other hand, the part is much too big (and too awkward) to mount on the faceplate of my lathe. I had been able to machine the plain outside diameter on the mill with the Wohlhaupter head, but the mill does not screw cut. In the end it occurred to me to do what an engineer without the luxury of a milling machine would possibly have done in the first place: Go milling on the lathe! So I first clamped the stub to be threaded in the lathe chuck and then devised some jigs to clamp the elbow to the cross slide. I made a 2.25" steel stub to go into the exhaust port end which I welded to a tube going onto the tool post and clamped the other end with some suitable blocks and a long bolt in the T slots on the slide table. |
 |
| I needed to modify an MT5/MT4 adaptor sleeve to go into the
headstock spindle, but then the Wohlhaupter went straight in.
A little fine tuning to make sure everything was well aligned (not too critical, as I had been wise enough not to completely finish the stub when I had it on the mill) was all I needed to do before I could... |
 |
| ... finish the outer diameter and the end face. |
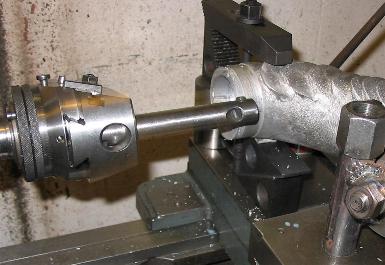 |
| I still had to grind a tool for screw cutting the thread,
but then the operation went quite smoothly (albeit looking a bit dangerous
while being on the move).
Of course, retracting the tool after each cut by turning the knurled ring on the Wohlhaupter is a bit of bother, but with a nice sharp tool I did not need to take too many cuts. Setting it all up, including fixtures etc took a number of hours, but rigging up and machining the second casting took just under an hour in total...well, you can still consider this a lot of time for making a thread! |
 |
| A word in conclusion: These coolers are available readily machined from the Brough Superior Club. I know the guy who is making them. They are not cheap, but now I know why, and I really feel the price is justified! |
Any kind of feedback to
![]() is
appreciated
is
appreciated
(sorry, this is not a clickable 'mailto:' hyperlink. If you want
to write me, please type my address in your mailer. )