 Vintage Workshop
Services for Brough Superior motorcycles and their contemporaries
|
Vintage Workshop Services for Brough Superior motorcycles and their contemporaries |
Silencers for the Montgomery
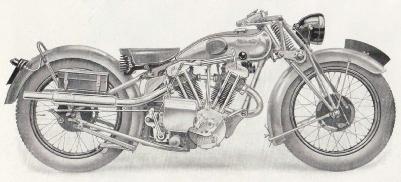
| Again, for a long time, all I had was a number of catalogue pictures. This one shows pretty clearly what the exhaust system looked like, at least on the offside. It also permitted the dimensions of the silencers to be determined. However, I was not able to decide if the pipe diameter used was 1 3/4" or somewhat smaller - which the scaling of the catalogue and other contemporary pictures seemed to indicate. |
|
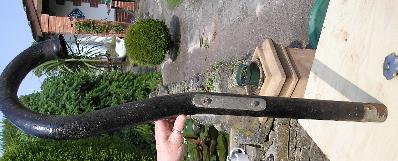
| Help came finally from fellow enthusiast Chris again, who measured the original pipe that was still with his bike - it is 1 5/8" outer diameter. |
|
| So I knew all I needed to know. I decided to make the silencers before attempting
to make the pipes, because it is very hard to decide on the exact shape of the latter
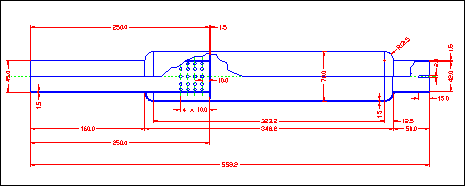
without knowing where they have to end... Now, originality fiends please don't write me hate mails, I like to have my exhaust systems in stainless steel, both for looks and for practicality. To my eyes, mildly buffed stainless steel looks just "right" on a vintage bike, probably because it resembles vintage nickel plating, and it acquires soon a lovely patina. I am aware that concours judges will (rightfully) insist on chromium plating for a 1931 bike, but it is my bike, and don't we know since Caesar's time that "de gustibus non disputandum" ... I thought there must be someone who makes stainless steel silencers but I could not find someone who was likely to do a good job. So finally I gave up making enquiries and decided to have a go myself...and I made a drawing to start with. By the way, peeping into various silencers I was surprised how many different baffle arrangements there are! I decided on the one shown in the drawing, which seemed simple and effective at the same time. |
|
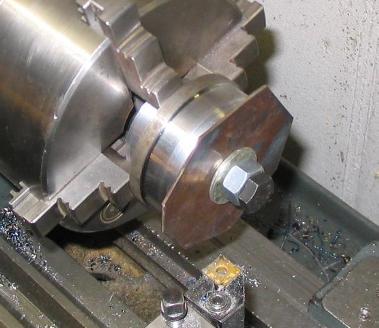
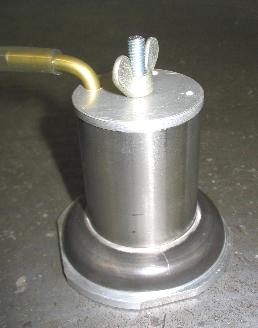
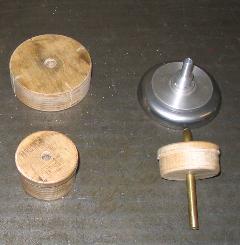
| Of course, the first challenge were the end caps - would I be able to
make these?
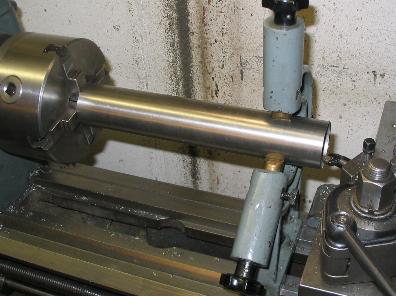
I remembered an unpleasant experience with spinning 1.5mm stainless steel, which told me that a hardwood die is pretty useless for this kind of job, so I made a steel one. |
|
| I tried to anneal the sheet metal before starting. I am using
1.4301, and I was surprised to learn that you have to heat these austenitic
stainless steels to 1050°C for a minute and then quench in cold water
to make them soft!
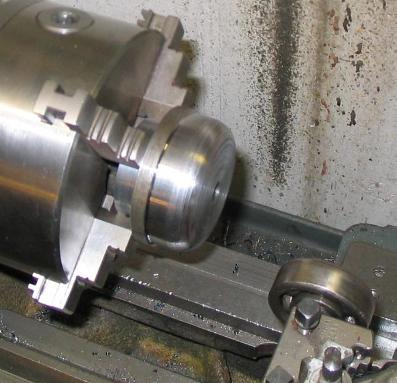
Here is the cutting which still needs to be machined round. Post up: I found later that the temperatures I had dared to use were too low to really permit re-crystallization. 1050° is bright yellow, and unless you apply this temperature under an inert gas atmosphere it will leave the surface badly corroded. The conclusion is that you can't really soften stainless a lot with on-board means, so next time I'll use the material "as is". |
|
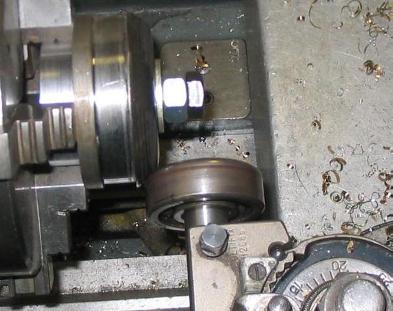
| Here, the spinning is already half done.
It was tough going, and it was a bit unfair for the traverse spindles of my poor old Robling lathe, but the material behaved quite well. |
|
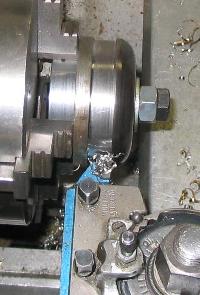
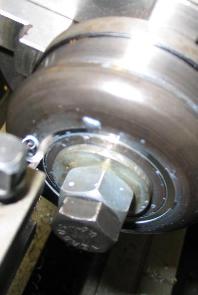
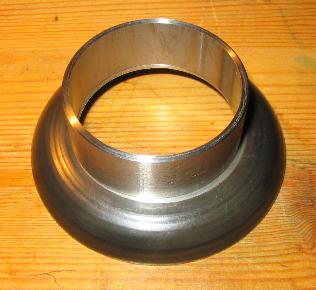
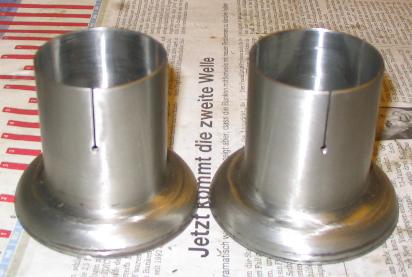
| After finishing the spinning, I just had to trim the end of the cap and cut the hole for the pipe. Using a parting tool on the axial work face is always a bit hairy, but it went without incident. |
|
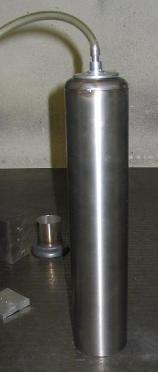
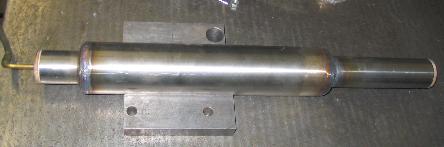
| This exercise successfully completed, I went ahead and bought some stainless pipe stock. Cutting thin-walled pipes of big diameter on a bandsaw can be a bit of an experience, and trimming the ends to be square and nicely chamfered (for welding), too - I could do the small ones on my Robling, but the 70mm body pipes did not quite fit into it's steady... |
|
| These are the bits I need to make the silencers. |
|
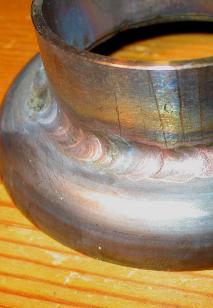
| Now, I am not what you would call a dab hand at TIG welding. So I made
one end cap extra to try how to weld the fillet seam best.
I was wondering, should I weld it from the inside, from the outside or maybe not at all - a thin fillet of silver solder might also look nice? |
|
| The welding test looked good in the beginning. After practising a while
on strips of stainless sheet I was able to weld a relatively nice, concave fillet seam.
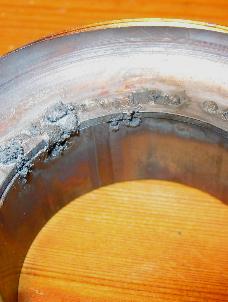
So I turned to the test piece. I made a piece of fillet weld from the outside, which looked very good indeed! I was mighty proud until I had a look at the inside - my dear, I had to find the surface riddeled with rough spots and small craters! I talked to an experienced welder - he told me that of course I need to flush the rear side of the work with Argon while welding to avoid the oxidation of the chromium. This sounded logical to me, if the cure appeared a bit exotic and expensive... |
|
| ...but I set to work, procured a second bottle of Argon, made a flushing jig for the end cap / tube joint and - lo and behold! - I was rewarded with a welding seam that looked relatively nice on the inside, too! |
|
| Unfortunately I found I needed a different jig for almost every weld - well at least the others were a bit simpler. |
|
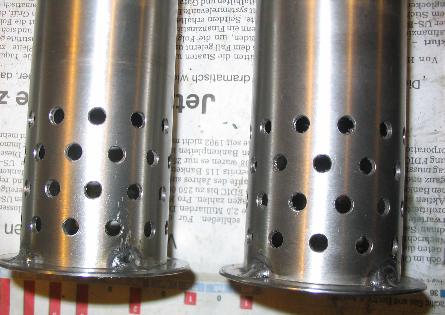
| Welding problem sorted, I had to tackle the fabrication of the "innards". After studying a number of silencers, I had decided to use the baffle design shown in the drawing above. This meant boring a relatively big number of holes into the tailpipe. Now I could have done this the quick and dirty way, just drilling by eyesight on the drill press, but being a "Deckelite" I wanted to do it in a more gentlemanly manner, with exact partitioning etc... |
|
| This produced a nice result, although no-one will be able to appreciate it once the silencer is assembled, at least not without using an endoscope... |
|
| I tried to make a nice job of slitting the inlet stubs, too. I made the cuts at 3 x 120° on the milling machine and dividing head, and made sure to drill off the slit ends - I have seen too many cracks propagating from there. |
|
| Now it was welding time again. Aligning and tacking on the end caps was a bit tricky, but two hours and half a bottle of Argon later I was there. |
 |
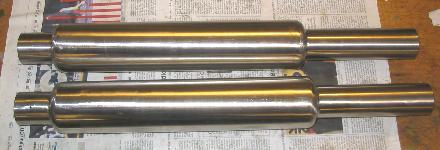
| The grinding and polishing proved to be rather laborious. In fact I promised myself not to repeat the whole exercise. Maybe with more practice the fillet joints could come out smoother, which might save some grinding...never mind, here are the two silencers after coarse grinding. |
 |
| to be continued... |
|
If you have any comments please send an e-mail to
![]()
(sorry, this is not a clickable 'mailto:' hyperlink. If you want
to write me, please type my address in your mailer. )